
Solution for installation of the cold room ceiling
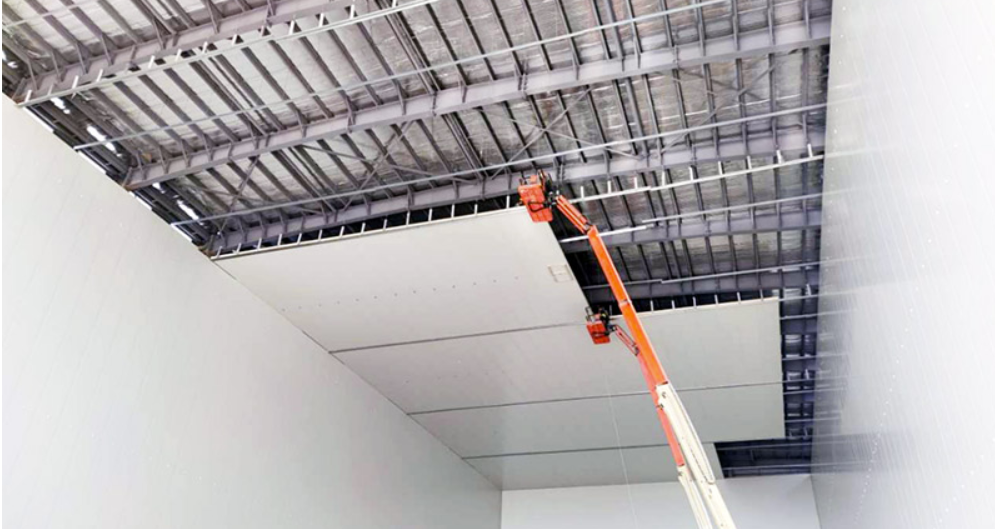
A cold room ceiling is arguably its most critical and challenging enclosure. Unlike cold room walls, it bears the constant downward force of gravity on the cold room panels, experiences the greatest temperature differences (heat naturally rises), and is susceptible to condensation and moisture accumulation. Improperly installed ceilings are a major cause of energy waste, temperature fluctuations, product damage, and costly structural damage. Selecting and implementing the correct cold room ceiling installation solution is crucial for long-term performance and efficiency. This article explores key strategies and methods for building a strong and reliable cold room ceiling.
Difficulties in installing the cold room ceiling
Three major issues to consider when selecting and installing a cold room ceiling.
Gravity and load of cold room ceiling
The cold room ceiling must be securely fastened to the ceiling and able to bear its own weight for a long time without sagging or falling off. Furthermore, for ease of maintenance, some cold room facilities require accessibility, which further increases the load on the cold room ceiling. Therefore, the type of cold room ceiling, as well as its sturdy structural support and specialized fasteners, must be considered at the outset of cold room design.
Thermal Bridging
Any penetrations (fasteners, supports) or gaps in the cold storage ceiling create pathways for heat to seep in, severely impacting efficiency and causing localized condensation and ice formation.
Suitability of cold room ceiling materials
All cold room ceiling components (including cold room ceiling panels, fasteners, sealants, and vapor barriers) must be able to withstand extreme sub-zero temperatures without becoming brittle, cracking, or losing adhesion.
Solutions for cold room ceiling
The industry standard and most effective solution for cold room ceilings is to use factory-designed insulated cold Metal Panels (IMPs), which are specifically designed with PIR (polyisocyanurate) or PUR (polyurethane) foam cores.
Selection and design of cold room ceiling
- Thickness: The thickness of the cold room ceiling depends on the required temperature of the cold room. Freezers (-20°C to -30°C) typically require 150mm to 200mm thick panels. Cold chillers (0°C to +4°C) may use 100mm to 150mm. At the same time, we must also consider the Gravity factors affecting cold room ceiling
- Core Type: PIR is preferred for its superior thermal resistance (highest R-value per inch), excellent fire performance (typically Class B or better), low thermal conductivity, and good dimensional stability. PUR is also effective but generally has a slightly lower R-value.
- Facing: Pre-coated galvanized steel or aluminum is standard. Aluminum offers better corrosion resistance in high humidity environments but is more expensive. Steel offers higher strength. Of course, stainless steel is also an option, offering both high strength and corrosion resistance in high humidity environments.
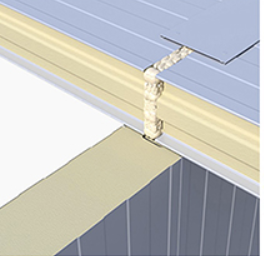
- Joint Design: Tongue-and-groove (T&G) joints are critical for ceilings. This interlocking mechanism provides inherent structural support between panels, aids in alignment, and, when used in conjunction with sealant, is the primary line of defense against air infiltration.
Structural Support System
When considering structural support systems, it is important to not only consider structural strength to ensure the integrity of the ceiling panels, but also to minimize thermal bridging effects.
Primary Framework of cold room ceiling
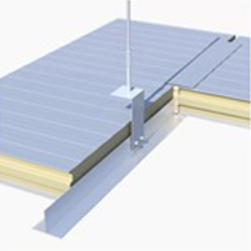
When hanging insulated ceiling panels in a cold storage room, we need to ensure that the suspension system can function properly over the long term.
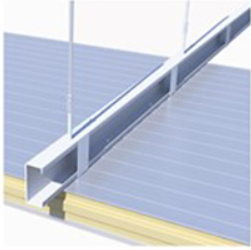
- Integrated Ceiling Truss System: Specially designed galvanized steel trusses are suspended from the building structure above. These trusses provide precise, horizontal support points for the selected Integrated Ceiling Modules (IMPs) and are specifically designed to fit the selected IMP spacing.
- Channel steel system: Galvanized steel channel steel (C-shaped or Z-shaped purlins) suspended from the main building structure. When loads are relatively heavy, a suspension system with higher load-bearing capacity must be considered, and galvanized purlins are the ideal choice for this requirement. During installation, they must be precisely aligned and leveled to ensure the flatness of the cold storage ceiling panels.
- Structural insulation support brackets: Brackets designed specifically to reduce thermal bridging, which can be fixed to walls or main support structures.
Minimizing Thermal Bridging
Since the supporting components must penetrate the insulation layer, thermal bridging is inevitable. We should minimize thermal bridging as much as possible.
- Thermal breaks: Use insulating spacers (such as high-density phenolic or composite blocks) between the cold room support members and the warmer building structure above. These insulating spacers reduce thermal bridges to some extent.
- Independent supports: Design supports so that they are primarily connected to the cold room structure, minimizing contact with hot masses.
Installation method for cold room ceiling
- Planning and sequencing: Before installation, systematically plan the layout of the cold storage ceiling tiles, starting from one corner, to minimize cuts. Ensure that all necessary penetrations (lights, sensors, sprinklers) are pre-planned and coordinated.
- Moisture barrier integrity: Before installing cold storage ceiling panels, ensure that the moisture barrier on the hot side (the ceiling facing the surrounding environment) is completely continuous and sealed at all joints and penetrations. This typically requires laying a separate layer of high-performance membrane on the support structure before installing the panels.
- Fastening: Fasteners must use specialized cold storage fasteners. The standard configuration for fasteners is self-drilling self-tapping screws, paired with large insulating washers (neoprene or EPDM rubber). During installation, fastening is primarily achieved through the vertical tenons of the cold storage ceiling panels. This hides the fastener heads beneath the overlapping panels and minimizes thermal bridging. It is recommended to secure fasteners to the supports at intervals of 300–600 millimeters along the supports. Avoid over-tightening, as this can compress the core material and impair insulation performance.
- Sealing: This is a critical step in reducing thermal bridging. Choose a low-temperature-approved polyurethane sealant (such as MS polymer-based sealant). Apply the sealant continuously and generously along the entire length of the joint, along the entire length of the groove, and before installing the tongue of the next panel (creating a seal within the joint). Apply to the top of the T&G joint after installation (secondary sealing). Apply to all panel edges where they meet the wall or other structure. Apply to each fastener head and penetration.
Conclusion
Installing a cold room ceiling is not merely hanging panels; it’s constructing a critical thermal and vapor barrier overhead under uniquely demanding conditions. You can create a ceiling that ensures constant temperature, maximizes energy efficiency, protects valuable products, and provides reliable performance throughout the entire service life of the cold room. If you have any questions, please contact SDpanel.